Ultimate Crispy Homemade Onion Rings
Achieve that perfect restaurant-style crunch at home with these golden panko-crusted onion rings. They are tender on the inside, shatteringly crispy on the outside, and surprisingly easy to make.

The Secret to the Crunch
The difference between a soggy onion ring and a great one lies in the breadcrumbs. While traditional breadcrumbs can become dense, Panko (Japanese-style breadcrumbs) are larger and airier. This texture absorbs less oil and creates a lighter, crispier shell that stays crunchy longer.
Another crucial element is the 'dry hand, wet hand' method. Keep one hand for the flour and breadcrumbs, and the other for the egg wash. This prevents your fingers from becoming breaded and ensures the coating sticks to the onion, not you.
💡 Professional Tip
Don't skip the baking powder in the flour mix! It reacts slightly with the heat, creating tiny air bubbles in the coating that make the rings feel lighter and crispier rather than heavy and doughy.
Frequently Asked Questions
This usually happens if the onion is too wet or smooth. The initial flour coating is vital—it creates a dry surface for the egg wash to cling to. Shake off excess flour, but ensure the onion is fully covered before dipping in egg.
Yes! Spray the breaded rings liberally with cooking spray. Air fry at 375°F for 10-12 minutes, flipping halfway through, until golden. They will be slightly drier than deep-fried but still delicious.
Sweet onions like Vidalia, Walla Walla, or Maui are best. They have a higher sugar content and milder flavor that contrasts beautifully with the salty, savory crust.
You can bread the onions and freeze them in a single layer on a baking sheet. Once frozen, transfer to a bag. Fry directly from frozen (add 1-2 minutes to cooking time).
Use a deep-fry thermometer and don't overcrowd the pot. Adding too many cold onions at once drops the oil temperature, leading to greasy rings. Fry in small batches.
Classic options include ketchup, ranch, or blooming onion sauce (horseradish mayo). For a twist, try a spicy chipotle mayo or a honey mustard dip.
Usually, the oil wasn't hot enough. If the oil is below 350°F, the breading absorbs oil rather than crisping up. Always check your temperature before adding a new batch.
Yes. Substitute the eggs with a flax egg mixture or commercial egg replacer, and use plant-based milk with a teaspoon of vinegar (vegan buttermilk) for the wet mix.
Recipe Troubleshooting Guide
Breading Sliding Off
Problem: The crust separates from the onion after biting
Solution: Remove the thin papery membrane from the onion rings before breading, and don't skip the flour dredging step.
Dark/Burnt Exterior
Problem: Rings turn dark brown before onion is cooked
Solution: Your oil is too hot. Lower the temperature to 375°F. If the onions are very thick, you might need 360°F for a slightly longer cook time.
Messy Clumping
Problem: Breading stations becoming a sticky mess
Prevention: Use the 'one hand wet, one hand dry' technique strictly. Use a fork to lift rings out of the egg wash.
Soft Crust
Problem: Rings aren't crispy enough
Recovery: Ensure you are using Panko, not fine breadcrumbs. Also, ensure oil temperature recovers between batches.
Flavor is Bland
Problem: The coating lacks punch
Prevention: Salt the rings immediately after frying while oil is still on the surface. Don't be afraid to season the flour mix generously.
Uneven Cooking
Too Sweet: Serve with a spicy chili sauce
Too Salty: Dip in a creamy ranch or yogurt sauce
Bland: Dust finished rings with seasoned salt or parmesan

Choosing the Right Onion
The star of this dish is the onion, so size matters. Look for large, firm onions that feel heavy for their size. Sweet varieties (Vidalia, Walla Walla) are the gold standard because they cook down to a soft, sweet jammy consistency that contrasts perfectly with the salty crunch.
Slice thickness is also a matter of debate, but for this recipe, 1/2 inch is the sweet spot. Too thin, and you only taste fried breading. Too thick, and the onion stays raw while the outside burns. Aim for uniformity so they all cook at the same rate.
Essential Ingredient Notes
- Sweet Onions: Look for flattened shapes rather than round ones; these are often the sweet varieties. Avoid red onions as they can discolor and have a sharper bite.
- Buttermilk: The acidity in buttermilk tenderizes the onion slightly and adds a nice tang to the batter. If you don't have it, mix milk with lemon juice.
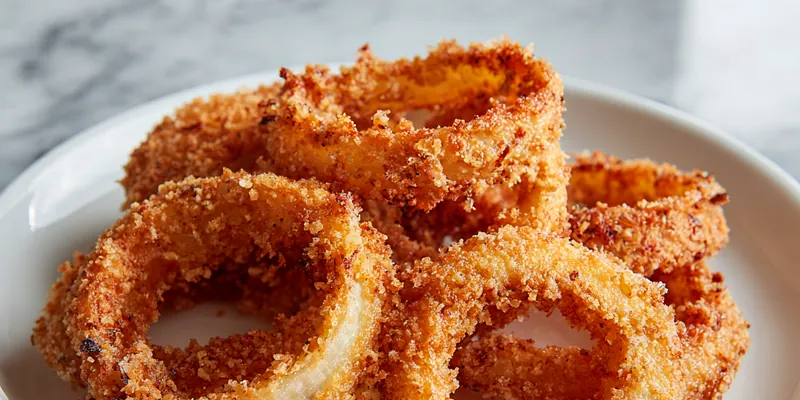
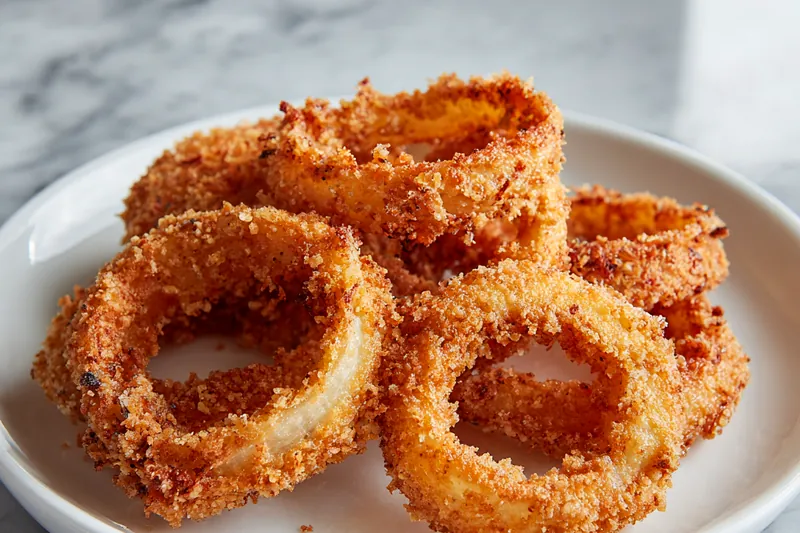
- Panko Breadcrumbs: Japanese style breadcrumbs are essential for that jagged, super-crispy texture shown in the photo. Do not substitute with fine Italian breadcrumbs.
Frying Fundamentals
Deep frying can be intimidating, but it's all about temperature maintenance. You need a neutral oil with a high smoke point—vegetable, canola, or peanut oil work best. Use a heavy-bottomed pot like a Dutch oven which holds heat better than a thin saucepan.
Once the rings hit the oil, don't walk away. They float when they are getting close to done. Flip them once halfway through to ensure an even golden color on both sides. Drain them on a wire rack rather than paper towels to prevent steam from making the bottom soggy.
The Wire Rack Trick
Never stack hot onion rings directly on top of each other immediately after frying. Place them in a single layer on a wire rack over a baking sheet. This allows air to circulate and keeps the crunch intact.
Ultimate Crispy Homemade Onion Rings
📋 Ingredients
Dry Mix & Dredge
- 2 large eggsBinder for the breadcrumbs
- 240ml buttermilkAdds tang and thickness to wash
- 200g panko breadcrumbsFor maximum crunch
- Vegetable oilNeutral oil for frying
- Sea saltFor finishing seasoning
Wet Mix & Coating
- 2 large sweet onionsVidalia or Walla Walla preferred
- 150g all-purpose flourBase coating for adhesion
- 1 tsp baking powderMakes coating light and airy
- 1 tsp smoked paprikaAdds color and mild spice
- 1/2 tsp garlic powderSavory flavor booster
- 1/2 tsp saltSeasoning the flour is key
Instructions
Prepare Onions
Peel the onions and slice them into 1/2-inch thick rounds. Separate the rings carefully. Save the small inner rings for another use or fry them as snacks.
Set Up Dredging Station
In a medium bowl, whisk together flour, baking powder, smoked paprika, garlic powder, and salt. In a second bowl, whisk the eggs and buttermilk. Place panko breadcrumbs in a third shallow dish.
Coat the Rings
Dip each onion ring first into the flour mixture (shake off excess), then into the egg mixture, and finally press firmly into the panko breadcrumbs to coat thoroughly. Place on a wire rack.
Fry the Rings
Heat 2 inches of oil in a heavy pot to 375°F (190°C). Fry rings in small batches (don't overcrowd) for 2-3 minutes per side until deep golden brown and crispy.
Drain and Serve
Transfer fried rings to a paper towel-lined plate or wire rack to drain. Sprinkle immediately with sea salt while hot. Serve warm.
Recipe Notes & Tips
Keep Warm
If making a large batch, keep the finished rings warm in a 200°F oven on a wire rack while you fry the remaining batches.
Serving Suggestions
These are best served immediately. Pair with burgers, steaks, or enjoy as a standalone appetizer with a variety of dips.
Leftovers
While best fresh, leftovers can be reheated in an air fryer at 350°F for 3-4 minutes to restore crispiness. Do not microwave.