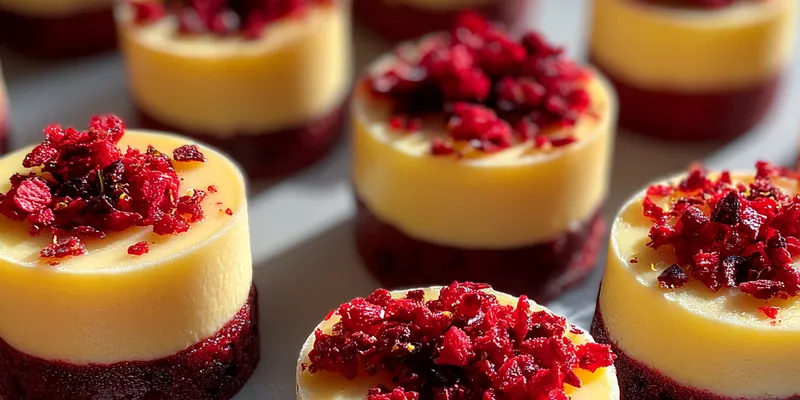
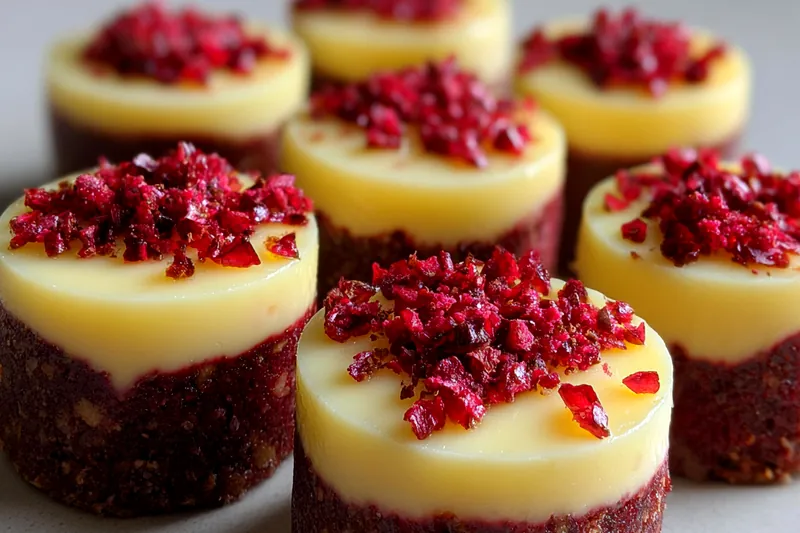
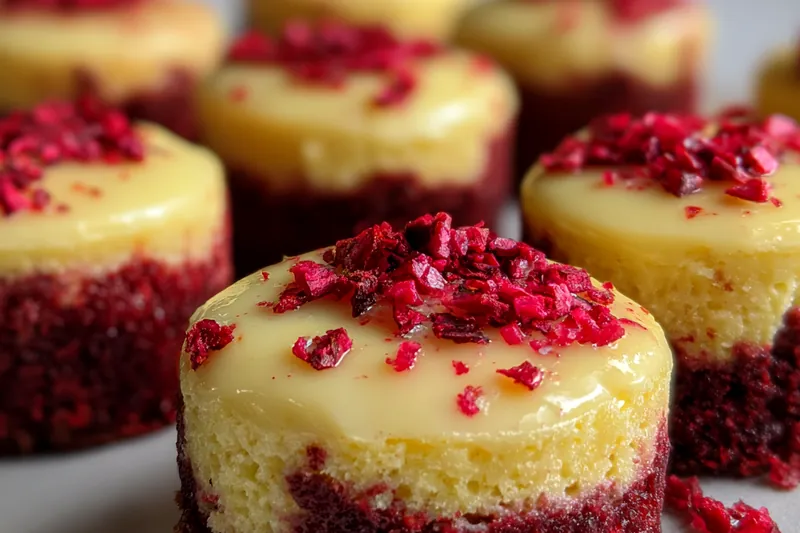
Red Velvet Mini Cheesecakes
Red Velvet Mini Cheesecakes combine the rich, velvety flavor of red velvet cake with the creamy texture of cheesecake. These delightful treats are perfect for any occasion, bringing a touch of elegance to your dessert table. Easy to make and incredibly delicious, they are sure to impress your friends and family. Enjoy these indulgent bites that are both visually stunning and satisfyingly sweet.

Why This Red Velvet Mini Cheesecakes Recipe Works
This recipe is special because it marries the classic flavors of red velvet cake with the smooth, creamy texture of cheesecake. The use of high-quality ingredients ensures that each bite bursts with flavor. Additionally, the mini size makes them perfect for sharing or enjoying as a single serving.
The technique of baking at a low temperature allows for a gentle set, resulting in a smooth and creamy texture without cracks. The combination of vinegar and baking soda creates a light and fluffy cheesecake that melts in your mouth. It's a foolproof method for achieving perfect mini cheesecakes every time.
💡 Professional Tip
For best results, make sure all your ingredients are at room temperature before mixing. This helps to create a smooth and lump-free batter. Also, avoid overmixing once you add the eggs to prevent the cheesecakes from cracking during baking.
Frequently Asked Questions
Absolutely! These mini cheesecakes can be made a day in advance. Simply store them in the refrigerator once they have cooled completely. This allows the flavors to meld beautifully, and they will taste just as delicious the next day.
If you're looking for a lighter alternative, you can use Greek yogurt or mascarpone cheese instead of cream cheese. However, keep in mind that this may alter the flavor and texture slightly, so it's best to use full-fat cream cheese for the richest flavor.
The mini cheesecakes are done when the edges are set but the center still has a slight jiggle. They will continue to firm up as they cool. Avoid overbaking, as this can lead to a dry texture.
Yes, you can freeze these mini cheesecakes! Make sure they are completely cooled and wrapped tightly in plastic wrap or an airtight container. They can be frozen for up to 2 months. Thaw them in the refrigerator before serving.
These mini cheesecakes pair wonderfully with fresh berries, a drizzle of chocolate sauce, or a dollop of whipped cream. You can also serve them alongside a scoop of vanilla ice cream for an extra indulgent dessert.
When stored properly in an airtight container, these cheesecakes will last about 5-7 days in the refrigerator. Make sure to keep them chilled until you're ready to serve.
Definitely! They can be made up to 2 days in advance. Just ensure they are stored in the refrigerator to maintain their freshness. They will be perfect for your special occasion or gathering.
It's best to serve these mini cheesecakes cold or at room temperature. If you need to reheat them, do so in the microwave at a low power for a few seconds. Be careful not to overheat, as this can alter the texture.
Recipe Troubleshooting Guide
Too Dry
Problem: If your mini cheesecakes come out dry, it usually means they were overcooked.
Solution: To prevent this in the future, keep an eye on the baking time and check for doneness a few minutes before the recommended time.
Not Crispy Enough
Problem: If the crust is too soft or not crispy, it may not have been baked long enough.
Solution: Ensure to bake the crust for at least 10 minutes before adding the filling to achieve a firmer texture.
Overcooked
Problem: Overcooked cheesecakes can become tough and lose their creamy texture.
Prevention: To avoid overcooking, use a water bath during baking for consistent heat and moisture, which helps in even cooking.
Undercooked Center
Problem: If the center is undercooked, the cheesecakes will be overly soft.
Recovery: Make sure to bake until the edges are set and the center is slightly jiggly; they will firm up as they cool.
Burnt Exterior
Problem: A burnt exterior can result from baking at too high of a temperature.
Prevention: Always bake at the recommended temperature and consider using a baking shield to protect the tops of your cheesecakes if necessary.
Flavor Balance
Too Sweet: If too sweet, consider adding a pinch of salt to balance the flavors.
Too Salty: If too salty, you can try adding a little more cream cheese to dilute the saltiness.
Bland: If the flavor is bland, a splash of vanilla or a bit more cocoa powder can enhance the richness.
Essential Ingredients for Red Velvet Mini Cheesecakes
The essential ingredients for these mini cheesecakes include cream cheese for the rich, creamy filling, and red food coloring for that iconic red velvet appearance. Using high-quality cocoa powder enhances the chocolate flavor, while fresh eggs add the right texture.
It's important to use room temperature ingredients for the best results. This helps achieve a smooth batter without lumps, contributing to the overall creamy texture of the cheesecakes.
Essential Ingredient Notes
- Cream Cheese: Always use full-fat cream cheese for a rich and creamy texture. Be sure to let it soften at room temperature for easy mixing and to prevent lumps in the batter.
- Red Food Coloring: Choose a high-quality gel food coloring for a vibrant red hue without altering the flavor. A little goes a long way, so start with a small amount and adjust to your preference.
- Sour Cream: Sour cream adds tanginess and moisture to the filling. You can also use Greek yogurt as a substitute for a lighter option, but it may change the texture slightly.
Step-by-Step Cooking Process
The cooking process begins with preparing the crust, which is essential for providing a firm base for the cheesecakes. Mixing the graham cracker crumbs with sugar and melted butter creates a flavorful foundation.
Once the crust is in place, preparing the cheesecake filling is key. Beating the cream cheese until smooth and adding the other ingredients ensures a creamy texture that sets perfectly during baking. Following these steps carefully will lead to perfect results.
Key Technique for Perfect Red Velvet Mini Cheesecakes
The key technique for these mini cheesecakes is to bake them at a low temperature in a water bath. This method helps maintain moisture, prevents cracking, and produces a wonderfully creamy texture that melts in your mouth.
Red Velvet Mini Cheesecakes
📋 Ingredients
Main Ingredients
- 1 cup butterRoom temperature
For the Sauce
- 1 cup crushed graham crackersFor the crust
- 2 tablespoons sugarFor the crust
- 1/4 cup melted butterFor the crust
- 1 lb cream cheeseSoftened
- 1 cup sugarFor the filling
- 2 large eggsFor the filling
- 1/4 cup sour creamFor the filling
- 1 teaspoon vanilla extractFor the filling
- 1 tablespoon cocoa powderFor the filling
- 1 tablespoon red food coloringFor the filling
- 1 teaspoon vinegarFor the filling
- 1/4 teaspoon baking sodaFor the filling
- 1/4 teaspoon saltFor the filling
- Whipped creamFor topping
- Chocolate shavingsFor garnish
Instructions
Prepare the crust
In a bowl, mix crushed graham crackers, sugar, and melted butter. Press the mixture into the bottom of each mini cheesecake pan.
Make the filling
In a large mixing bowl, beat cream cheese and sugar until smooth. Add eggs, one at a time, mixing well after each addition.
Add other ingredients
Mix in sour cream, vanilla extract, cocoa powder, red food coloring, vinegar, baking soda, and salt until well combined.
Fill the crusts
Pour the cheesecake filling evenly over the prepared crusts in the mini cheesecake pans.
Bake
Preheat the oven to 325°F (160°C) and bake for 25-30 minutes, until the centers are set.
Cool down
Allow the cheesecakes to cool to room temperature, then refrigerate for at least 2 hours before serving.
Serve
Top each mini cheesecake with whipped cream and chocolate shavings before serving.
Recipe Notes & Tips
Storage Tips
For optimal freshness, store the mini cheesecakes in an airtight container in the refrigerator. They can be kept for up to a week, but are best enjoyed within the first few days.
Serving Suggestions
Serve these delightful mini cheesecakes with a side of fresh berries or a drizzle of chocolate sauce for an extra touch. They also pair beautifully with a cup of coffee or tea.
Recipe Variations
Feel free to experiment with different flavors by adding extracts such as almond or hazelnut. You can also try using different toppings like crushed nuts or fruit compotes for added variety.