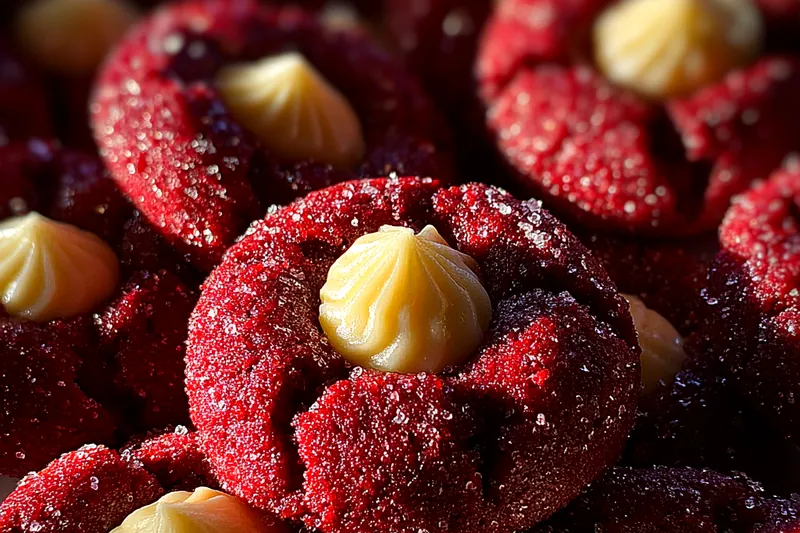
Delicious Red Velvet Cookies
Delicious Red Velvet Cookies are a delightful twist on a classic. With their vibrant color and rich flavor, they are perfect for any occasion. These cookies are soft, chewy, and packed with flavor, making them irresistible. Whether you’re baking for a celebration or a casual treat, these cookies will impress everyone.


Why This Delicious Red Velvet Cookies Recipe Works
This recipe combines the rich, chocolatey goodness of cocoa with the unmistakable flavor of red velvet. The secret lies in the balance of ingredients that create a soft, chewy texture. The addition of white chocolate chips provides a creamy sweetness that complements the cocoa perfectly.
The technique of creaming the butter and sugar ensures a light and fluffy dough, while the careful mixing of dry and wet ingredients prevents overworking the dough, which can lead to tough cookies. Baking them just right allows for a perfect soft center with slightly crisp edges.
💡 Professional Tip
For best results, use room temperature ingredients, especially the butter and egg. This will help achieve a better texture and consistency in your cookie dough. Additionally, avoid overbaking to maintain that delightful chewiness.
Frequently Asked Questions
Absolutely! You can prepare the dough in advance and refrigerate it for up to 3 days. Just make sure to wrap it tightly to prevent drying out. When you're ready to bake, let it sit at room temperature for about 15 minutes before scooping and baking.
You can substitute butter with an equal amount of coconut oil, vegetable shortening, or even a vegan butter alternative. Keep in mind that the flavor may vary slightly with these substitutes, but they will still yield delicious results.
The cookies are done when the edges appear set and slightly golden, while the centers may look a bit soft. This is normal, as they will continue to firm up while cooling on the baking sheet.
Yes, these cookies freeze well! Allow them to cool completely, then store them in an airtight container or a freezer bag. They can be frozen for up to 3 months. To enjoy, simply thaw them at room temperature or heat them in the microwave for a few seconds.
These cookies pair wonderfully with a glass of cold milk or a scoop of vanilla ice cream. They also make a great addition to dessert platters alongside other treats for parties or gatherings.
Stored in an airtight container, these cookies can last up to a week in the fridge. Just make sure to keep them sealed to maintain their freshness and prevent them from drying out.
Yes, you can prepare the dough a day in advance and store it in the refrigerator. You can also bake the cookies ahead of time and freeze them for later. Just make sure to let them cool completely before freezing.
To reheat, place the cookies on a microwave-safe plate and heat for about 10-15 seconds. Alternatively, you can warm them in a preheated oven at 350°F (175°C) for about 5 minutes to regain that fresh-baked softness.
Recipe Troubleshooting Guide
Too Dry
Problem: If your cookies come out too dry, they may have been overbaked or had too much flour.
Solution: To remedy this, ensure you measure your flour correctly, using the spoon and level method. Bake the cookies just until the edges are set and the centers look slightly underbaked.
Not Crispy Enough
Problem: If your cookies are not crispy, they may not have been baked long enough.
Solution: Make sure to extend the baking time slightly while monitoring closely to avoid overcooking. A little more time in the oven can help achieve that desired crispness.
Overcooked
Problem: If the cookies are overcooked, they may become hard and lose their chewy texture.
Prevention: To prevent this, always set a timer and check for doneness a couple of minutes before the recommended baking time. Remember, cookies will continue to cook as they cool on the baking sheet.
Undercooked Center
Problem: Cookies with an undercooked center may not have had enough baking time.
Recovery: If you find your cookies are undercooked, you can return them to the oven for a couple of minutes. Make sure to monitor them closely to achieve the right texture.
Burnt Exterior
Problem: A burnt exterior indicates that the cookies were baked at too high a temperature or for too long.
Prevention: Always preheat your oven and use an oven thermometer to ensure accuracy. If you notice they are browning too quickly, lower the temperature slightly.
Flavor Balance
Too Sweet: If the cookies are too sweet, consider reducing the sugar by a few tablespoons next time.
Too Salty: If too salty, check your ingredient measurements and consider using unsalted butter in the future.
Bland: If the flavor is bland, try adding a teaspoon of vanilla extract or extra cocoa powder to enhance the taste.
Essential Ingredients for Delicious Red Velvet Cookies
Key ingredients include all-purpose flour, unsweetened cocoa powder, and butter, which create the foundation of the cookie's unique flavor and texture. The red food coloring gives these cookies their signature vibrancy, making them stand out.
Using high-quality cocoa powder and real butter will greatly enhance the taste of the cookies. For the best results, opt for fresh ingredients, particularly the baking soda and flour, to ensure the cookies rise perfectly.
Essential Ingredient Notes
- All-Purpose Flour: Choose a good quality all-purpose flour for the best texture. Sifting it before use can help aerate the flour, resulting in lighter cookies.
- Unsweetened Cocoa Powder: Use high-quality cocoa powder for a rich flavor. Avoid Dutch-processed cocoa if you want to maintain the cookie's vibrant red color.
- Red Food Coloring: Select a gel or liquid food coloring specifically for baking. Gel food coloring gives a more intense color with less liquid, preventing the dough from becoming too wet.

Step-by-Step Cooking Process
This cookie recipe involves a straightforward method that any baker can follow. Start by preheating the oven and preparing your baking sheet. Mixing the dry and wet ingredients separately helps create a well-combined dough.
The key to achieving the perfect texture is to avoid overmixing once you combine the dry and wet ingredients. This will keep your cookies soft and chewy, ensuring they are a delightful treat.
Key Technique for Perfect Delicious Red Velvet Cookies
The creaming method is crucial for these cookies. It involves beating the butter and sugar together until fluffy, which incorporates air into the mixture and helps create a tender cookie. Pay attention to not overmix after adding the dry ingredients to maintain a soft texture.
Delicious Red Velvet Cookies
📋 Ingredients
Main Ingredients
- 1 cup butterRoom temperature
For the Sauce
- 2 cups all-purpose flourSifted
- 1 cup sugarGranulated
- 1/2 cup unsweetened cocoa powderFor flavor
- 1 teaspoon baking sodaFor leavening
- 1/2 teaspoon saltTo balance flavor
- 1 cup butterSoftened
- 1 large eggFor binding
- 2 tablespoons red food coloringFor color
- 1 teaspoon vanilla extractFor flavor
- 1/2 cup white chocolate chipsOptional mix-in
Instructions
Preheat Oven
Preheat your oven to 350°F (175°C) and line a baking sheet with parchment paper.
Mix Dry Ingredients
In a bowl, whisk together the flour, cocoa powder, baking soda, and salt.
Cream Butter and Sugar
In a separate bowl, cream together the softened butter and sugar until light and fluffy.
Add Egg and Color
Beat in the egg, then mix in the red food coloring and vanilla extract until well combined.
Combine Mixtures
Gradually add the dry ingredients to the wet mixture, mixing until just combined.
Fold in Chocolate Chips
Gently fold in the white chocolate chips.
Scoop Dough
Scoop tablespoons of dough onto the prepared baking sheet, spacing them about 2 inches apart.
Bake
Bake for 12-15 minutes or until the edges are set. Let cool on the baking sheet for a few minutes before transferring to a wire rack.
Recipe Notes & Tips
Storage Tips
Store the cookies in an airtight container at room temperature for up to a week. For longer storage, freeze the cookies after they have cooled completely to maintain freshness.
Serving Suggestions
Serve these cookies warm with a glass of milk or as part of a dessert platter. Pairing them with cream cheese frosting can also elevate their deliciousness.
Recipe Variations
Feel free to add in nuts, or swap out white chocolate chips for dark chocolate chips for a different flavor profile. You can also experiment with different extracts, such as almond or hazelnut, to customize the taste.