Moist & Tangy Orange Velvet Cake
Everyone knows Red Velvet, but have you met its sunny cousin? This Orange Velvet Cake takes the classic tender 'velvet' texture—created by the reaction between buttermilk, vinegar, and baking soda—and infuses it with bright, zesty citrus notes. It's sunshine on a plate.

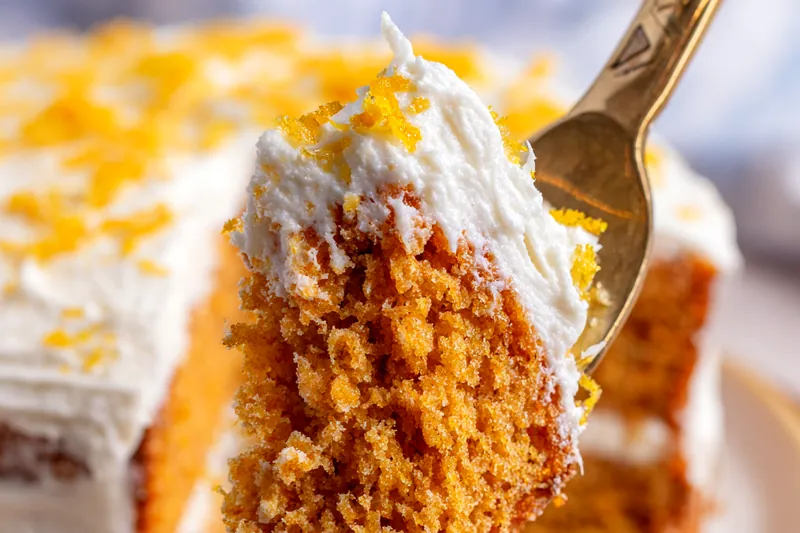
What Makes it 'Velvet'?
The term 'velvet' in cake making refers to the texture, not just the color. The chemical reaction between the acidic buttermilk and vinegar with the baking soda creates tiny air bubbles that break down the gluten strands.
This results in a crumb that is exceptionally fine, soft, and 'velvety' smooth, rather than open and bready. While Red Velvet uses a touch of cocoa, this Orange Velvet relies on the same chemistry but uses orange oils for flavor.
💡 Professional Tip
For the most vibrant color and flavor, rub the orange zest into the sugar with your fingers before adding it to the mix. This releases the essential oils into the sugar, intensifying the citrus aroma throughout the cake.
Frequently Asked Questions
No, the food coloring is purely for aesthetics. Without it, the cake will be a pale yellow-orange color but will taste exactly the same. Gel coloring is recommended for a vibrant hue without thinning the batter.
Freshly squeezed is best for flavor, but store-bought works in a pinch. However, do not skip the fresh zest—that is where 80% of the orange flavor comes from.
Opening the oven door too early or underbaking can cause sinking. The velvet batter is heavy and needs time to set its structure. Rely on the toothpick test.
Yes! This recipe will make about 24 standard cupcakes. Bake them for 18-22 minutes at 350°F.
When you level the domed tops of your cake layers with a serrated knife, save those scraps! Crumble them with your hands or pulse them in a food processor to make the decoration.
You can, but oil is superior for velvet cakes. It keeps the cake moist for days and ensures the texture stays soft even when refrigerated (which is required due to the cream cheese frosting).
You can make a substitute by adding 1 tablespoon of lemon juice or white vinegar to a cup of whole milk and letting it sit for 5 minutes until curdled.
Yes, both the layers (unfrosted) and the finished cake freeze well. Wrap tightly in plastic wrap and freeze for up to 3 months.
Recipe Troubleshooting Guide
Cake is Dry
Problem: The crumb feels tough or dry.
Solution: You likely overmeasured the flour (spoon and level, don't scoop!) or overbaked it. Velvet cakes go from perfect to dry quickly, so watch the timer.
Frosting Too Runny
Problem: Cream cheese frosting is sliding off the cake.
Solution: Use full-fat brick cream cheese, not tub style. Ensure butter and cheese are room temp, but not melting. If it's too soft, chill the frosting for 20 minutes before using.
Curdled Batter
Problem: Batter looks lumpy or separated.
Prevention: This happens if ingredients are at different temperatures (e.g., cold eggs and warm oil). Usually, it will come back together when you add the flour. Don't worry!
Bitter Taste
Problem: The cake has a bitter aftertaste.
Recovery: When zesting the oranges, be careful to only grate the bright orange outer layer. The white pith underneath is very bitter.
Uneven Layers
Problem: Cakes baked with huge domes.
Prevention: Use cake strips around the pans to insulate the edges, or lower the oven temp by 25 degrees and bake longer. Standard domes can just be trimmed off.
Flavor Variations
Too Sweet: Add white chocolate chips to the batter.
Too Salty: Add a pinch of salt to the frosting or top with salted caramel.
Bland: Add a teaspoon of orange extract in addition to the juice and zest.
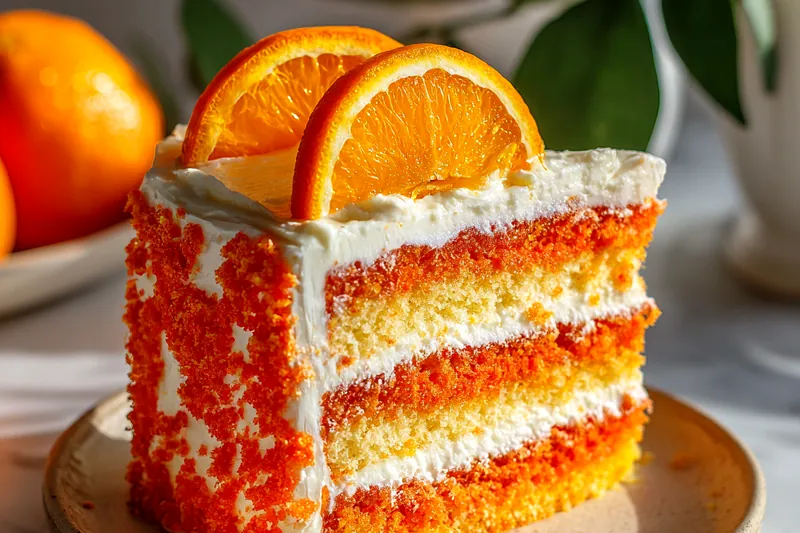
The Crumb Coating Technique
The signature look of this cake comes from the crumb coating on the exterior. This isn't just aesthetic; it adds a lovely texture and hides any imperfections in your frosting skills!
To achieve this, apply a layer of frosting to the sides of the cake. Take a handful of cake crumbs (made from your trimmed tops) and gently press them into the side of the cake, working from the bottom up. Let excess crumbs fall back onto the plate.
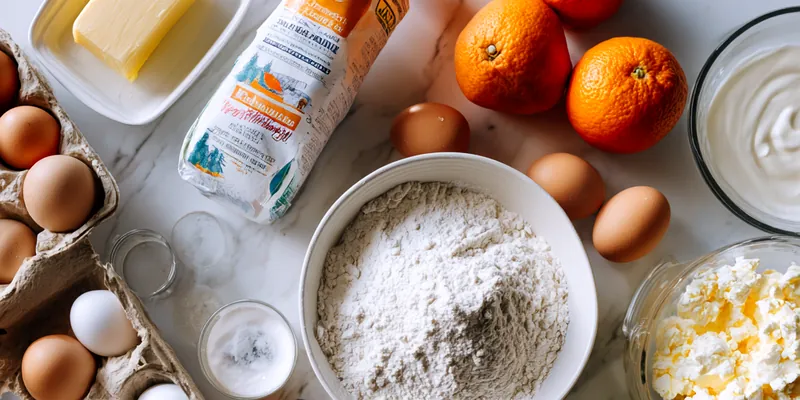
Essential Ingredient Notes
- Vegetable Oil: Use a neutral oil like canola or vegetable. Do not use olive oil, as its flavor is too strong for this delicate citrus cake.
- Orange Gel Coloring: Gel coloring is much more concentrated than liquid drops. You only need a small amount to get a vivid orange without adding extra liquid to the batter.
- Buttermilk: Real buttermilk is essential for the tenderizing acid. If using a substitute, full-fat milk with vinegar is the best option.
Storing and Serving
Because of the cream cheese frosting, this cake must be stored in the refrigerator. However, cold cake can feel dense and dry. The secret to serving is to slice the cake while cold (it cuts cleaner), then let the slices sit at room temperature for 15-20 minutes before eating.
This allows the butter in the cake and frosting to soften, returning the texture to its intended velvety state.
Room Temperature Ingredients
For a smooth, emulsified batter, it is non-negotiable that your eggs, buttermilk, and butter be at room temperature. Cold ingredients will shock the fat, leading to a curdled batter and a dense, uneven cake.
Moist & Tangy Orange Velvet Cake
📋 Ingredients
Cake Batter
- 8 oz Cream CheeseSoftened block style
- 1/2 cup ButterUnsalted, softened
- 4 cups Powdered SugarSifted
- Orange SlicesFresh, for garnish
Frosting & Decoration
- 2 1/2 cups FlourAll-purpose
- 1 1/2 cups Vegetable OilFor moisture
- 1 cup ButtermilkRoom temperature
- 2 tbsp Orange ZestFreshly grated
- 1/4 cup Orange JuiceFreshly squeezed
- 2 Large EggsRoom temperature
- Orange Food ColoringGel preferred
Instructions
Preheat and Prep
Preheat oven to 350°F (175°C). Grease and flour three 8-inch round cake pans. Line bottoms with parchment paper.
Mix Dry Ingredients
In a medium bowl, whisk together the flour, sugar, baking soda, and salt. Set aside.
Mix Wet Ingredients
In a large bowl, whisk together the eggs, vegetable oil, buttermilk, vinegar, vanilla extract, orange zest, and orange juice until well combined. Stir in the orange food coloring until you reach your desired shade.
Combine
Gradually add the dry ingredients to the wet ingredients, whisking until just combined and smooth. Do not overmix.
Bake
Divide the batter evenly among the prepared pans. Bake for 25-30 minutes, or until a toothpick inserted into the center comes out clean. Let cool in pans for 10 minutes, then transfer to a wire rack to cool completely.
Make Frosting
Beat the softened cream cheese and butter together until smooth and creamy. Gradually add powdered sugar, one cup at a time, beating on low speed. Add a pinch of salt and a splash of vanilla. Beat on high for 2 minutes until fluffy.
Assemble
Level the tops of the cakes with a knife (save the crumbs!). Place one layer on a serving plate, spread with frosting, and repeat with remaining layers. Frost the top and sides.
Decorate
Crumble the trimmed cake tops into fine crumbs. Press these crumbs onto the sides of the frosted cake. Top with fresh orange slices.
Recipe Notes & Tips
Make Ahead
You can bake the cake layers up to 2 days in advance. Wrap them tightly in plastic wrap and store at room temperature. The flavor actually improves as the oil distributes!
Coloring Tip
The color of the batter will darken slightly as it bakes. Aim for a color slightly lighter than your desired final result when mixing.
Serving Size
This is a rich cake! It easily serves 12-16 people. For cleaner slices, wipe your knife with a warm damp cloth between cuts.