Grilled Cheese Bites with Herb Garnish
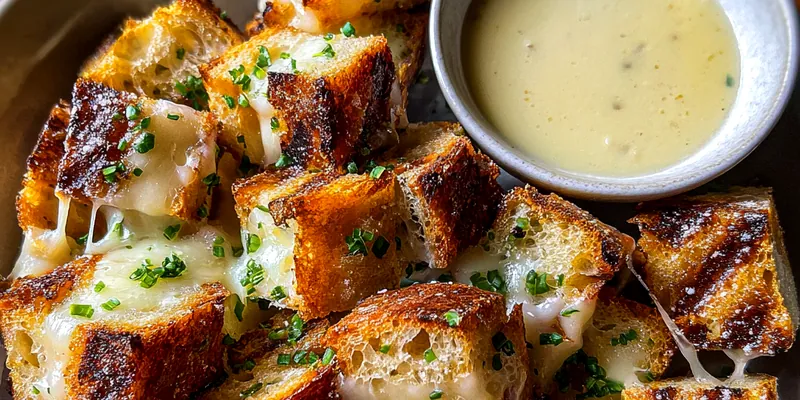
Grilled Cheese Bites with Herb Garnish are the ultimate comfort food with a twist. These bite-sized snacks make the perfect appetizer for any gathering or a delicious treat for yourself. Gooey melted cheese encased in crispy bread, garnished with fresh herbs, will delight your taste buds. Quick and easy to prepare, they require minimal ingredients and maximum flavor!

Why This Grilled Cheese Bites with Herb Garnish Recipe Works
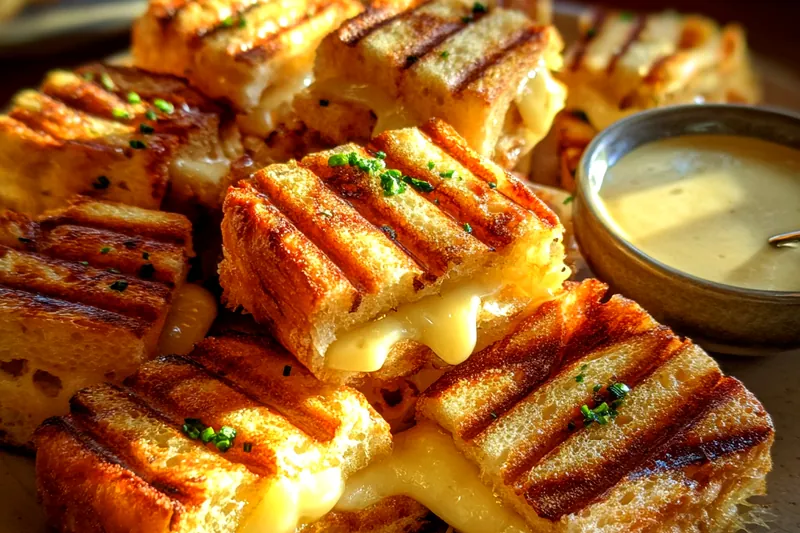
This recipe elevates the classic grilled cheese into a bite-sized treat that's packed with flavor. The combination of sharp cheddar and mozzarella provides a rich and gooey texture, while the fresh herbs add a delightful freshness. Easy to prepare, these bites are great for parties, game nights, or as an indulgent snack.
The technique of cooking the sandwiches in a mix of butter and olive oil ensures a perfectly crispy exterior. By cutting them into smaller pieces, you get the ideal portion for sharing and pair beautifully with various dipping sauces.
💡 Professional Tip
For the best results, make sure your cheese is at room temperature before mixing. This allows it to melt more evenly during cooking. Also, don’t rush the cooking process; keep your heat at medium to ensure a golden brown crust.
Frequently Asked Questions
Yes, you can make the grilled cheese bites ahead of time. Prepare them as instructed and store them in an airtight container in the refrigerator. They’ll keep well for up to 2 days. When ready to serve, simply reheat them in a skillet or oven until warmed through.
If you don’t have sourdough bread, you can use any type of bread you prefer. Whole grain, white, or even a gluten-free bread works well. Just make sure it's sturdy enough to hold the cheese filling without getting soggy.
You’ll know the grilled cheese bites are done when they are golden brown on the outside and the cheese is melted and gooey on the inside. You can also check by gently pressing on the bites; they should feel crispy and firm.
Yes, you can freeze the grilled cheese bites! Lay them out on a baking sheet in a single layer and freeze until solid. Once frozen, transfer them to an airtight container or freezer bag. They will keep well for up to 2 months. Reheat them directly from frozen when you’re ready to enjoy.
These bites pair excellently with a variety of dipping sauces. Tomato soup is a classic choice, but you can also serve them with marinara, ranch dressing, or a spicy aioli for extra flavor. Fresh veggies or a light salad can also complement this rich snack.
Grilled Cheese Bites with Herb Garnish can last in the fridge for up to 2 days when stored in an airtight container. Make sure they are cooled completely before storing to prevent moisture buildup, which can make them soggy.
Absolutely! You can prepare the cheese and bread ahead of time and simply assemble and cook them when you are ready to serve. This makes for an easy and quick snack during parties or gatherings.
The best way to reheat the bites is in a skillet over medium heat. Add a little butter or oil to help crisp them up again. You can also use an oven or toaster oven, heating them at 350°F (175°C) for about 10 minutes until warmed through.
Recipe Troubleshooting Guide
Too Dry
Problem: The grilled cheese bites turn out too dry after cooking.
Solution: Ensure you're using enough cheese and butter. Adding a bit more butter to the skillet can also help maintain moisture during cooking.
Not Crispy Enough
Problem: The bites are not crispy on the outside.
Solution: Make sure to cook them at medium heat and not too quickly. A good amount of fat, like butter or oil, in the pan also contributes to crispiness.
Overcooked
Problem: The bites have burnt or overcooked edges.
Prevention: Keep an eye on the heat; use a lower setting if they’re browning too fast. Also, flipping them regularly can help achieve an even golden color.
Undercooked Center
Problem: The center of the bites is not fully melted.
Recovery: To avoid this, make sure the cheese is at room temperature before cooking, and consider covering the skillet with a lid for a minute or two to trap heat and help melt the cheese inside.
Burnt Exterior
Problem: The outside of the bites is burnt while the inside remains cold.
Prevention: Lower the heat and give them more time to cook, allowing the inside to warm up without burning the outside. You can also try a thicker slice of bread.
Flavor Balance
Too Sweet: If the bites taste too sweet, add a pinch of salt or a dash of hot sauce to balance the flavor.
Too Salty: If too salty, consider serving with a sweeter dip or pairing with something fresh like sliced cucumbers.
Bland: To fix a bland taste, enhance the seasoning with more herbs, spices, or a sprinkle of cheese on top before serving.
Essential Ingredients for Grilled Cheese Bites with Herb Garnish
The key ingredients for this recipe are high-quality cheeses and fresh herbs. Sharp cheddar and mozzarella create a rich, gooey filling, while fresh parsley and chives enhance the flavor with their aromatic qualities. Using fresh bread also ensures a crisp exterior that complements the creamy interior.
Always opt for the freshest ingredients available. Fresh herbs not only add flavor but also a vibrant color to your bites. The choice of bread can also make a difference—look for artisan or bakery bread for the best texture and taste.
Essential Ingredient Notes
- Sharp Cheddar Cheese: Using sharp cheddar cheese enhances the flavor of your bites significantly. It provides a nice balance of creaminess and tangy flavor that pairs beautifully with other cheeses.
- Fresh Herbs: Fresh herbs like parsley and chives add a wonderful brightness to the bites. They not only improve flavor but also add color, making your dish more appealing.
- Sourdough Bread: Sourdough bread has a hearty texture that holds up well when grilling. Its slight tang complements the richness of the cheese, making every bite delicious.
Step-by-Step Cooking Process
Cooking Grilled Cheese Bites is simple and fun! Start by preparing your cheese mixture and assembling the sandwiches. The key is to ensure even cooking to achieve the desired golden-brown crust. Patience during cooking allows the cheese to melt perfectly.
Monitoring the heat is essential for perfect results. A medium heat setting will give you the crispy exterior while allowing the interior to warm up without burning. Don’t forget to flip the sandwiches regularly for even browning!
Key Technique for Perfect Grilled Cheese Bites with Herb Garnish
The most important technique for perfect grilled cheese bites is controlling the heat. Cooking them too quickly at high heat will burn the outside while leaving the cheese unmelted. A moderate heat allows the cheese to melt beautifully while achieving a golden brown crust.
Grilled Cheese Bites with Herb Garnish
📋 Ingredients
Main Ingredients
- 1 cup butterRoom temperature
- 1/4 cup fresh herbsChopped
- 1 tablespoon lemon juiceFreshly squeezed
- Salt and pepperTo taste
- 1 tablespoon garlic powderFor flavor
For the Sauce
- 1 loaf of sourdough breadSliced
- 1 cup shredded sharp cheddar cheeseFor filling
- 1 cup shredded mozzarella cheeseFor filling
- 1/2 cup cream cheeseSoftened
- 1/4 cup fresh parsleyChopped
- 1/4 cup fresh chivesChopped
- 4 tablespoons unsalted butterFor grilling
- 1 teaspoon garlic powderFor flavor
- 1 teaspoon onion powderFor flavor
- Salt and pepperTo taste
Instructions
Prepare the Cheese Mixture
In a bowl, combine the shredded cheddar, mozzarella, cream cheese, garlic powder, onion powder, and season with salt and pepper. Mix well until combined.
Assemble the Bites
Spread a generous amount of the cheese mixture on a slice of sourdough bread. Top with another slice of bread to make a sandwich.
Preheat the Pan
Heat a skillet over medium heat and add 1 tablespoon of butter and a drizzle of olive oil.
Cook the Sandwiches
Once the butter is melted, add the sandwiches. Cook for 3-4 minutes on each side or until golden brown and the cheese is melted.
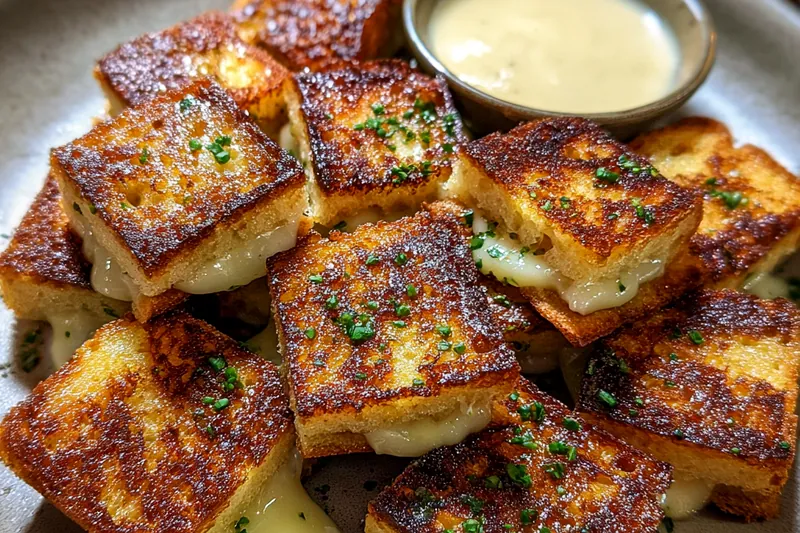
Cut into Bites
Remove the sandwiches from the skillet and let them cool slightly. Cut each sandwich into bite-sized pieces.
Garnish
Sprinkle the chopped parsley and chives over the grilled cheese bites for a fresh herb garnish.
Serve
Serve warm with your choice of dipping sauce or enjoy as is!
Recipe Notes & Tips
Storage Tips
To store your Grilled Cheese Bites with Herb Garnish, place them in an airtight container once cooled. They can be kept in the fridge for up to 2 days. If you want to keep them longer, consider freezing them for up to 2 months.
Serving Suggestions
These bites are versatile and can be served on their own or with a variety of dipping sauces. Pair them with tomato soup, marinara sauce, or a creamy ranch dressing for an unforgettable snack experience.
Recipe Variations
Feel free to experiment with different types of cheese or add ingredients like cooked bacon or sautéed vegetables. For a spicy kick, add jalapeños or serve with a spicy dipping sauce.