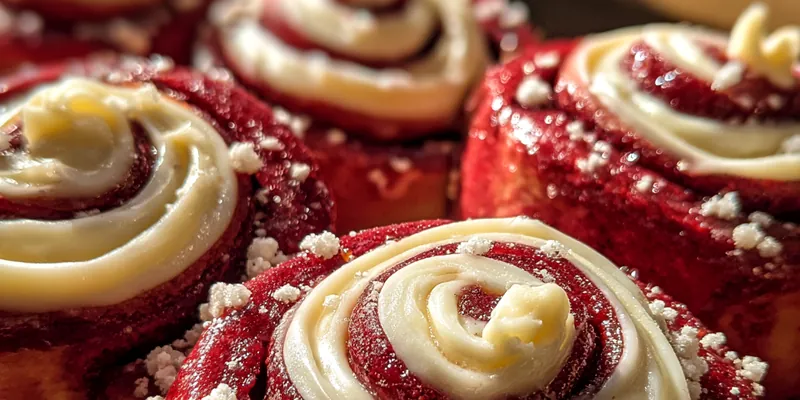
Delicious Red Velvet Treats
Delicious Red Velvet Treats are a delightful twist on a classic dessert. Their vibrant color and rich flavor make them a perfect treat for any occasion. Topped with a creamy frosting, these treats are sure to impress your guests and satisfy your sweet tooth. Get ready to indulge in this delectable dessert!

Why This Delicious Red Velvet Treats Recipe Works
This recipe for Delicious Red Velvet Treats stands out due to its unique combination of flavors and textures. The rich cocoa flavor is complemented by the slight tang of buttermilk, which adds depth to the treats. The vibrant color not only pleases the eye but also enhances the overall experience of enjoying this classic dessert.
The technique used in this recipe ensures a moist and tender crumb. By carefully measuring the ingredients and mixing them properly, the treats come out perfectly every time. The addition of cream cheese frosting elevates the whole dish, providing a creamy contrast that balances the sweetness.
💡 Professional Tip
For the best results, make sure all your ingredients are at room temperature before you start. This helps them combine more easily and ensures a smoother batter. Also, do not overmix once the dry ingredients are added to keep the treats light and fluffy.
Frequently Asked Questions
Yes, you can make the treats a day ahead. Once baked and cooled, store them in an airtight container. This allows the flavors to meld together, making them even more delicious. Just frost them right before serving for the best texture and presentation.
If you don't have buttermilk, you can create a substitute by mixing one cup of milk with a tablespoon of vinegar or lemon juice. Let it sit for about 5 minutes before using. This will give you a similar tangy flavor and acidity needed for this recipe.
The treats are done when a toothpick inserted into the center comes out clean or with a few moist crumbs. Additionally, the edges should start to pull away from the sides of the pan. Be sure not to overbake, as this can dry them out.
Absolutely! You can freeze the treats either whole or sliced. Wrap them tightly in plastic wrap and then place them in an airtight container or freezer bag. They will keep well for up to 3 months. Just thaw in the fridge before serving.
These treats pair wonderfully with a cup of coffee or a glass of milk. For a festive touch, serve them with a scoop of vanilla ice cream or a dollop of whipped cream on the side. Fresh berries also complement the rich flavors nicely.
In the fridge, Delicious Red Velvet Treats can last up to 5 days when stored properly in an airtight container. For the best taste and texture, consume them within the first few days after baking.
Yes, you can make the treats in advance! Bake and cool them, then store them in the fridge. Just be sure to add the frosting before serving to keep it fresh and creamy.
To reheat, place the treats in the microwave for about 15-20 seconds. This will warm them up without drying them out. If you prefer, you can also place them in a preheated oven at 350°F (175°C) for a few minutes.
Recipe Troubleshooting Guide
Too Dry
Problem: If your treats turn out dry, it could be due to overbaking or too much flour.
Solution: To avoid dryness, keep a close eye on baking time and measure flour accurately. Adding a little more buttermilk can also help retain moisture.
Not Crispy Enough
Problem: If the treats are not crispy, it may be due to underbaking.
Solution: Ensure you bake them until they are set but still moist. If desired, you can finish them off under the broiler for a minute or two to add a slight crisp.
Overcooked
Problem: If the treats are overcooked, they may be tough and dry.
Prevention: To prevent overcooking, use an oven thermometer to verify the actual temperature. Check doneness a few minutes before the recommended time.
Undercooked Center
Problem: If the center of the treats is undercooked, they may be gooey or wet.
Recovery: If you find the center is undercooked, return them to the oven for an additional 5-10 minutes, checking for doneness regularly.
Burnt Exterior
Problem: Burnt edges or top may occur if the temperature is too high.
Prevention: To prevent burning, monitor the oven temperature and use parchment paper to line the pan. Adjust baking time as necessary for your oven.
Flavor Balance
Too Sweet: If the treats are too sweet, consider reducing the sugar in the batter or frosting.
Too Salty: Too salty can be balanced by adding a little more sugar and cream cheese to the frosting.
Bland: If the flavor is bland, consider adding a bit more cocoa powder or vanilla extract for depth.
Essential Ingredients for Delicious Red Velvet Treats
The key ingredients in this recipe are all-purpose flour, cocoa powder, and buttermilk. Each plays a crucial role in achieving that signature red velvet flavor and texture. The cocoa provides depth, while the buttermilk contributes to the tenderness and moisture of the treats.
Using high-quality ingredients is essential for the best results. Opt for fresh cocoa powder and real vanilla extract to enhance the flavor. Ensuring your butter and cream cheese are at room temperature will also make for a smoother frosting.
Essential Ingredient Notes
- All-Purpose Flour: Use a good quality all-purpose flour for the best structure. Sift it before measuring to avoid lumps, and ensure it is leveled off for accuracy.
- Cocoa Powder: Opt for Dutch-processed cocoa powder for a richer flavor. Make sure it is unsweetened to maintain the balance of sweetness in the treats.
- Cream Cheese: Choose full-fat cream cheese for the frosting to achieve a rich and creamy texture. Ensure it's softened for easy mixing.
Step-by-Step Cooking Process
The cooking process for Delicious Red Velvet Treats is straightforward and accessible for bakers of all levels. Begin by preparing your wet and dry ingredients separately, ensuring each is well mixed before combining them. This method helps create a smooth and uniform batter.
Baking these treats requires careful attention to timing and temperature. Once out of the oven, allow them to cool properly before frosting. This step is crucial to achieving a delectable balance between the moist cake and creamy frosting.
Key Technique for Perfect Delicious Red Velvet Treats
The key technique lies in the mixing process. Avoid overmixing once the dry ingredients are added to the wet. This helps maintain a light and airy texture, resulting in tender treats that are moist and flavorful.
Delicious Red Velvet Treats
📋 Ingredients
Main Ingredients
- 1 cup butterRoom temperature
- 1 cup cream cheeseSoftened
- 4 cups powdered sugarSifted
- 2 tbsp milkAdjust as needed
- 1 tsp vanilla extractFor flavor
For the Sauce
- 2 cups all-purpose flourSifted
- 1 1/2 cups granulated sugarFor sweetness
- 1 tsp baking sodaFor leavening
- 1 tsp saltTo enhance flavor
- 1 cup vegetable oilFor moisture
- 1 cup buttermilkFor tenderness
- 2 large eggsRoom temperature
- 2 tbsp cocoa powderUnsweetened
- 2 tbsp red food coloringFor color
- 1 tsp vanilla extractFor flavor
Instructions
Preheat Oven
Preheat your oven to 350°F (175°C) and grease a baking pan.
Mix Dry Ingredients
In a bowl, whisk together the flour, baking soda, salt, and cocoa powder.
Combine Wet Ingredients
In another bowl, mix the vegetable oil, buttermilk, eggs, food coloring, and vanilla extract until well combined.
Combine Mixtures
Gradually add the dry ingredients to the wet ingredients, mixing until just combined.
Pour Batter
Pour the batter into the prepared baking pan and smooth the top.
Bake
Bake in the preheated oven for 30-35 minutes or until a toothpick inserted into the center comes out clean.
Cool
Remove from the oven and let cool in the pan for 10 minutes, then transfer to a wire rack to cool completely.
Prepare Frosting
In a mixing bowl, beat together the cream cheese and butter until smooth. Gradually add powdered sugar and milk, mixing until creamy.
Frost Treats
Once the treats are cooled, spread the cream cheese frosting evenly over the top.
Serve
Slice into squares and serve your delicious red velvet treats!
Recipe Notes & Tips
Storage Tips
To ensure your Delicious Red Velvet Treats stay fresh, store them in an airtight container at room temperature for up to 3 days. If you need to keep them longer, refrigerate them for up to 5 days. Always bring them to room temperature before serving for the best flavor and texture.
Serving Suggestions
These treats are best enjoyed fresh but can also be served with a scoop of vanilla ice cream or a drizzle of chocolate sauce. For a festive touch, garnish with fresh berries or mint leaves.
Recipe Variations
For a fun twist, try adding chocolate chips or nuts to the batter for added texture. You can also experiment with different frostings like vanilla buttercream or a tangy citrus glaze to complement the flavors.